
A first aid kit is a vital tool for every home. Accidents happen when you least expect them. You might cut your finger while cooking. Your child might scrape a knee at the park. A good kit helps you treat minor injuries fast. It also keeps small problems from getting worse.
You do not need to spend a lot of money on a pre-made box. You can build your own kit with simple items from a local store. This guide shows you how to create an effective kit for your family.
Choose the Right Container
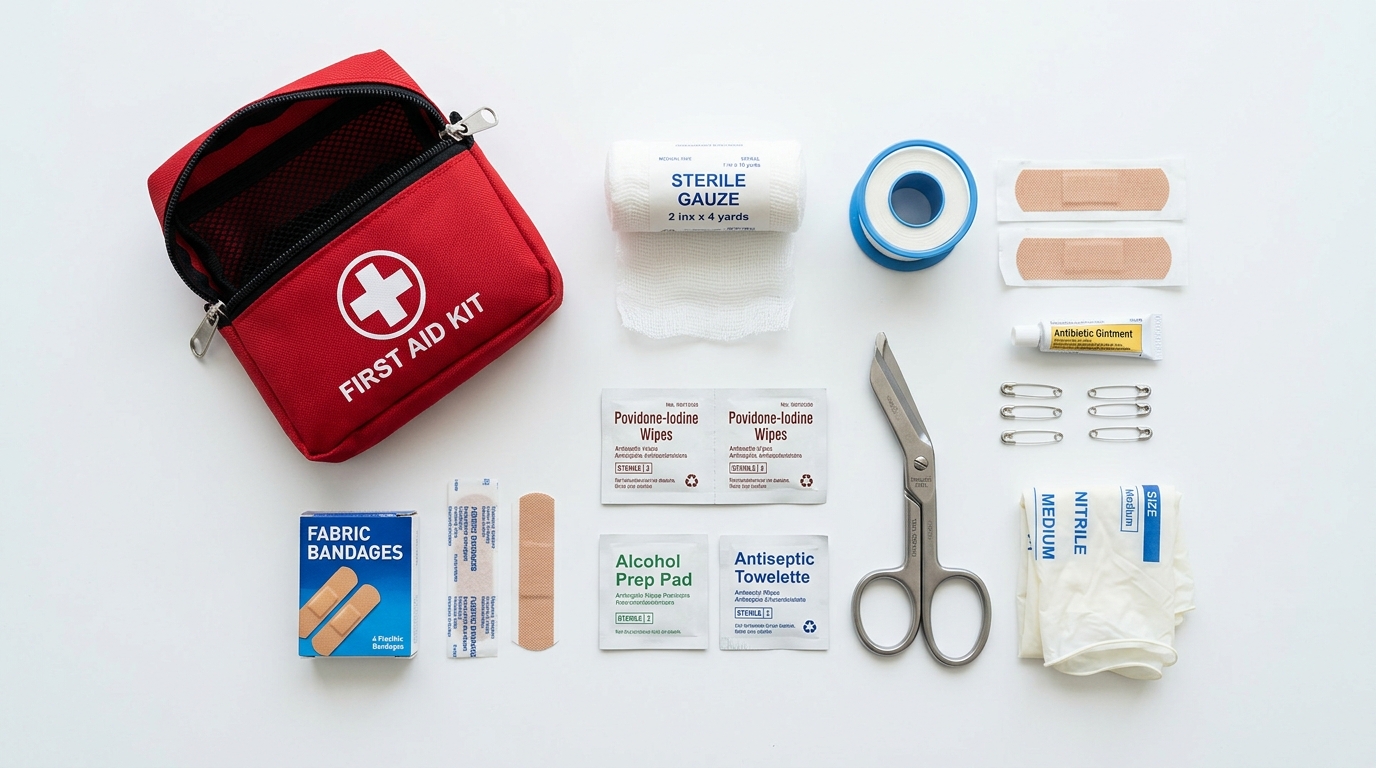
The first step is finding a good box. You want a container that stays dry inside. Plastic bins with tight lids work best. You can also use a nylon bag with a strong zipper. Make sure the container is easy to carry. You might need to move it quickly during an emergency. Choose a bright color like red or orange. This makes the kit easy to find in a dark cupboard. Label the outside of the box clearly. Use a thick marker and write “FIRST AID” in large letters.
Clean and Protect the Wound
Small cuts need cleaning to prevent infection. Dirty wounds can lead to serious health issues. You must include items that kill germs.
Antiseptic Wipes and Liquids
Buy a pack of antiseptic wipes. These are small and easy to use. Use them to clean the skin around a cut. You should also pack a small bottle of rubbing alcohol. This cleans your tools like tweezers or scissors. Hydrogen peroxide is another good option for initial cleaning.
Antibiotic Ointment
Buy a tube of antibiotic cream. This gel keeps the wound moist and kills bacteria. Apply a thin layer before you put on a bandage. It helps the skin heal faster. It also prevents the bandage from sticking to the scab.
Hand Sanitizer and Gloves
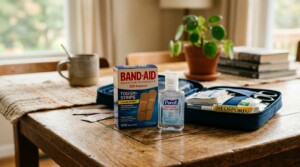
Clean hands are essential. You do not want to put more dirt into a wound. Put a small bottle of hand sanitizer in your kit. Also, add three pairs of latex-free gloves. Gloves protect you from blood and other fluids. Always put on gloves before you touch someone else’s injury.
Essential Bandages and Dressings
Bandages cover the wound and stop bleeding. You need different sizes for different body parts.
Adhesive Bandages
Most people call these Band-Aids. Buy a box with various shapes. You need tiny ones for fingers and large ones for knees. Look for waterproof versions. These stay on better if you get sweaty or wet.
Sterile Gauze Pads
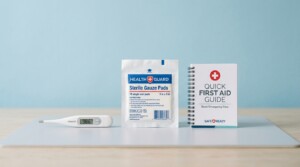
Sometimes a small bandage is not enough. Gauze pads handle larger scrapes or heavy bleeding. Keep several square pads in their original wrappers. Do not open them until you need them. This keeps them sterile and safe.
Rolled Gauze and Medical Tape
Rolled gauze wraps around an arm or a leg. It holds gauze pads in place. You also need medical tape to secure the ends. Paper tape is great because it does not hurt the skin when you pull it off.
Triangular Bandages
A triangular bandage is a large piece of cloth. You can use it as a sling for a broken arm. It also works as a large wrap for a head injury. Fold it up small to save space in your box.
Basic Tools for Minor Surgery
You do not need many tools, but a few items are very helpful. These tools help you handle small tasks safely.
Tweezers
Tweezers are perfect for removing splinters. They also help you pull out small bits of glass or dirt. Choose tweezers with a flat tip for a better grip. Always clean them with alcohol after every use.
Sharp Scissors
You need scissors to cut gauze and tape. They also help you cut clothing away from an injury. Buy a pair of “trauma shears” if possible. These have blunt ends so you do not poke the skin by accident.
Safety Pins
Safety pins hold bandages or slings together. Keep five or six pins in a small plastic bag. They are cheap and very useful in a pinch.
Common Medications for Daily Use
Your kit should handle pain and sudden illness. Check these medicines every six months. Throw away anything that is past the expiration date.
Pain Relief
Include a small bottle of ibuprofen or acetaminophen. These pills reduce fever and stop headaches. They also help with muscle pain or toothaches. Keep a version for children if you have kids at home.
Allergy Medicine
Pack an antihistamine like diphenhydramine. This helps if someone has an allergic reaction to a bug bite. It also stops itchy rashes. If a family member has a known severe allergy, keep their special auto-injector here too.
Stomach Relief
Add a few antacid tablets for heartburn. You might also want medicine for diarrhea. Stomach issues can make a trip very difficult. Having these pills ready saves a lot of trouble.
Treatment for Burns and Stings
Burns and bites happen often during the summer. You need specific items to cool the skin and stop the itch.
Burn Gel or Spray
Burn gel contains aloe or lidocaine. It cools the skin instantly. This stops the pain from small kitchen burns. Never put butter or ice on a burn. Use the gel and cover it loosely with gauze.
Hydrocortisone Cream
This cream stops the itch from bug bites. It also helps with poison ivy or heat rashes. A small tube lasts a long time. It prevents people from scratching and causing an infection.
Extra Items for Comfort
A few non-medical items make a big difference during an emergency. These items help you see better or stay warm.
Flashlight and Extra Batteries
Power outages often happen during storms. A small LED flashlight helps you see a wound clearly. Check the batteries once a year. Store the batteries outside the flashlight so they do not leak.
Instant Cold Packs
These are plastic bags full of chemicals. You squeeze the bag and it turns ice cold. They are perfect for bumped heads or sprained ankles. They reduce swelling and numb the pain.
Emergency Blanket
An emergency blanket looks like silver foil. It reflects body heat to keep a person warm. This is vital if someone is in shock or if the weather is cold. It takes up almost no space in your kit.
Include an Instruction Manual
In a crisis, you might forget your training. A small first aid guide is a lifesaver. Buy a pocket-sized manual from the Red Cross. It tells you exactly what to do for choking, bleeding, or burns. You should also write down emergency phone numbers. Include the number for your local doctor and the poison control center. Tape this list to the inside lid of the container.
Maintain Your First Aid Kit
Building the kit is only the start. You must take care of it over time. Check your kit twice a year. Use the start of spring and the start of autumn as reminders.
Replace Used Items
If you use a bandage, buy a new box immediately. Never leave your kit empty. An empty kit is useless when the next accident happens.
Check Expiration Dates
Medicine loses its power over time. Some liquids can grow bacteria after a few years. Look at every tube and bottle in your box. Toss out anything that is old. Replace it with a fresh version.
Check the Batteries
Flashlight batteries die over time. Turn the light on to see if it is bright. If the light is dim, put in new batteries.
Where to Store Your Kit
Store your kit in a place everyone knows. The kitchen is usually the best spot. Most home accidents happen there. Keep it in a high cupboard so young children cannot reach the medicine. Do not store it in the bathroom. The steam from the shower can ruin the bandages and pills. If you travel often, build a second kit for your car. Keep the car kit in the glove box or under the front seat.
Conclusion
Building a first aid kit is a simple task. It gives you peace of mind. You now know which tools and medicines are most important. Gather these items today and put them in a sturdy box. Teach your family where the kit stays. Show them how to use the items inside. Preparation is the best way to keep your loved ones safe. You are now ready to handle life’s small emergencies with confidence.
- Benefits Of Drinking Lemon Water Every Morning
- A Guide to Understanding Serum Creatinine and Kidney Health
Fact checked by:
- Dr. Mr. Muhammad Umer – (BHMS) & PhD- Nutrition
- Dr. Mr. Muhammad Adnan Iqbal – MBBS, Shandong Medical University
- Homeopathic Dr. Anum Zulfiqar Shakir – (BHMS) – Islamia University
- Mr. Muhammad Fareed – Administrator Fitness-1st